 Edit Channel Horizontal Design button. Then select a channel or back-of-footway line to modify.
Nearly all possible shapes of channel/footpath can be constructed by using the Widening, Parallel, and Mitre Corner design tools. These tools allow you to add design items that are based on centreline chainage and offset from the centreline. So, when the associated centreline is repositioned, designs using these items update with these changes as they keep the same relative position to the centreline. This makes them very flexible and you mayHowever, a limitation to the chainage and offset approach is that the items cannot overlap or reverse the chainage direction. To input designs that cannot be achieved due to this limitation, the amorphous design tool must be used instead.
With the amorphous tool you can draw lines to define portions of the channel. These lines stay locked to the project coordinates that that they were added at, so the standard design items may be preferred for the bulk of the design as they are generally more flexible with changes to a layout.
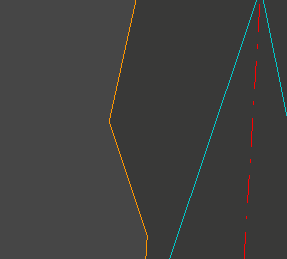
Below is an example where the channel zig-zags and the corresponding centreline chainage goes back and forth along the channel which has been input using the amorphous design tool:

The amorphous design tool is available when editing the horizontal design of a channel or footway. From the ![]() Channel Tools click on the Edit Channel Horizontal Design button. Then select a channel or back-of-footway line to modify.
Channel Tools click on the Edit Channel Horizontal Design button. Then select a channel or back-of-footway line to modify.
From the channel edit toolbar, press the ![]() Amorphous button to open up the amorphous design tools. The following toolbar will appear to the right of the channel design toolbar:
Amorphous button to open up the amorphous design tools. The following toolbar will appear to the right of the channel design toolbar:


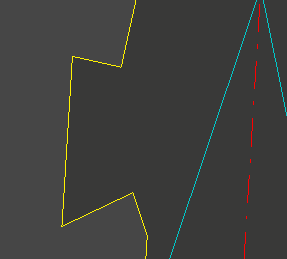
The amorphous design tools work just like the centreline design tools.
Pressing the ![]() New Amorphous button will allow you to draw the line you want to splice into the channel.
New Amorphous button will allow you to draw the line you want to splice into the channel.
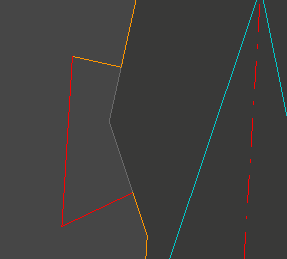
When drawing the amorphous line it will show as a red line. The amorphous line overwrites any underlying design and, if it isn't touching the underlying channel at the start and end points of the line, it will get connected with a perpendicular line to tie it in.
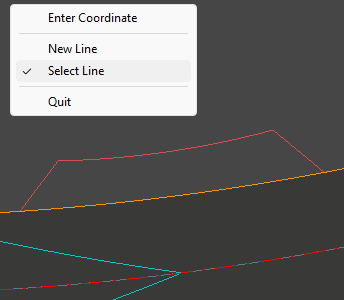
When you are drawing a new amorphous line you can right click to get some additional options. The "Select Line" option on the right click menu will allow you to pick a polyline from a drawing to copy the design from.
From the channel edit toolbar, press the ![]() Delete Amorphous button to delete any amorphous lines that have been added to the channel.
Delete Amorphous button to delete any amorphous lines that have been added to the channel.
If there are any amorphous items on your design the closest amorphous design line will highlight as you move the cursor near it. Click the mouse to delete the highlighted amorphous line.